Minecraft Skin from Picture

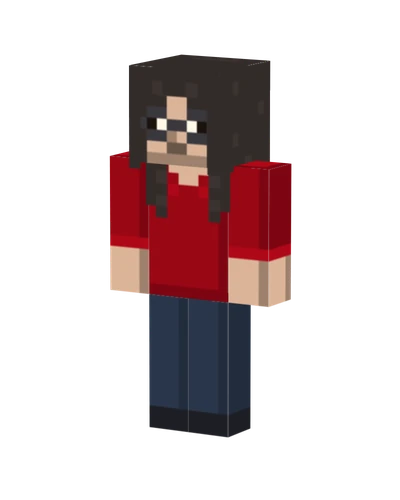
Make my skin — no-watermark from $1
Making a Minecraft skin from a picture starts with choosing what you want your character to keep: your hair, glasses, favorite hoodie or outfit colors. A photograph is a reference, while the finished skin is a tiny texture painted onto a block model. This guide helps you prepare a useful picture, understand the file you eventually need, and install a finished PNG in the right edition.
How to turn a picture into a Minecraft skin
Use the photo-to-skin generator to sample your portrait colors into a mapped skin texture. Choose a clear portrait, set the photo regions, choose a style and edition, and generate. The result uses Classic four-pixel arms; saving with a visible watermark costs nothing, and one credit saves without the watermark.
Choose a picture that works as a Minecraft skin
Use a recent picture of yourself, or someone who has agreed to let you use their picture. Look straight at the camera with both eyes visible. Keep your hairline, ears and chin in the frame; these edges explain your head shape better than a dramatic pose. A plain wall behind you makes dark hair easier to separate from the background.
A group shot gives each face too little space. Choose a single-person picture with sharp eyes and no motion blur. Remove sunglasses unless you want them on the character. Keep ordinary glasses if they are part of your look, but avoid reflections that hide your eyes. Skip beauty filters, since they can change the colors you are trying to copy.
Get lighting and crop right
Face a window for soft daylight across both cheeks. Strong sunlight creates shadows that can be mistaken for your natural skin tone; a lamp behind your head makes the face too dark. Before choosing colors, check that your forehead and cheeks look similar in brightness. If one side is almost black, take another picture rather than trying to recover missing detail.
Crop away empty background, leaving the whole head and a little room above the hair. A head-and-shoulders view is useful for facial details and shirt color. For a complete outfit, keep a second reference showing trousers and shoes. Do not stretch the picture into a square or crop off your fringe just to fill the frame. Save the original so you can check details later.
What the 64×64 skin format means
The standard skin file is a 64×64 PNG, with 4,096 pixel positions arranged as an unfolded map of the character. Separate rectangles cover the front, back, sides, top and bottom of each body part. Shrinking your picture to 64×64 does not make it a usable skin: the game needs those rectangles in their assigned places.
The front of the face has only 8×8 pixels. Choose a small palette and keep a few recognizable features instead of copying every shadow. Use an opaque base layer for the body and a partly transparent outer layer for hair volume, glasses or a jacket. Classic arms are four pixels wide; Slim arms are three. Remember the model when importing.
Use the picture as a drawing reference
Open a skin editor with a 3D model view, choose your arm model and place the picture beside it. Sample a cheek color, a hair color and the main clothing colors. Fill the large areas first, then add eyes, a neckline and shoes. Check the back and sides as you rotate the model; a front-facing picture cannot show every surface, so keep unseen areas simple.
Our guide to making a Minecraft skin of yourself covers the drawing process in more detail. Save the finished texture as PNG. Keep it at its native size, and avoid photo-app filters or JPG saves that blur pixel edges.
Import a finished skin in Java Edition
- Open the Minecraft Launcher, select Minecraft: Java Edition and open Skins.
- Select New skin, give it a name and choose the matching Classic or Slim model.
- Use Browse to select the saved PNG, check the model and press Save & Use.
Import a finished skin in Bedrock Edition
On Windows, Android or iOS, open Dressing Room, select a character slot and go to Classic Skins. Under Owned, choose Import, then Choose New Skin. Select the PNG and confirm the matching arm model. Consoles do not support importing custom PNG skins; use their built-in skin options instead.
For troubleshooting, see how to change your Minecraft skin. The Minecraft skin guide explains Java installation; the Character Creator FAQ covers Bedrock import limits.
Start with your picture and a style
Choose your picture on the homepage, pick Classic, Cartoon, Knight or Spooky, select your edition and generate your skin. Your photo stays on your device. Inspect the result in 3D, then save with a visible watermark or use one credit to save without it. To refine details by hand, follow the drawing guide above to paint and save your 64×64 PNG in a skin editor.
How to turn a picture into a Minecraft skin?
Open Photo2Skin, choose a clear JPG, PNG or WEBP portrait, and adjust the Head, Face and Clothing regions. Choose a style and edition, then generate a 64×64 Classic-arm skin. Saving with a visible watermark costs nothing; one credit saves without the watermark. Import the PNG using the Classic model in Java or supported Bedrock devices.